Yuki Clothing

plain and simple


10 Comments

Christmas stocking

Merry Christmas everyone!

I’m not really sure if Christmas stockings are common in Sweden in general but it’s always been a tradition in my family. During my childhood, my parents would always surprise me with a present from Santa in my Christmas stocking on the morning on Christmas eve. This year, I wanted to surprise my husband with a Christmas stocking of his own (and of course a small present :) ).

While he was at work, I made this stocking from some burlap that was leftover from the Christmas tree sack and decorations and some red linen I had in my fabric pile. The pattern is drafted based on a picture of an actual knitted stocking that I found on Google.


3 Comments

Sack for the Christmas tree and Christmas decoration

Normally, we would buy a traditional Christmas tree that would occupy a large part of our living room but this year’s Christmas tree looks a bit different compared to previous years. The reason is of course lack of space. Where we’d normally put the tree, there is now a changing table and a baby stroller. The obvious solution was to find a really slim tree that we could squeeze in beside the changing table! And that is why we bought a modern and scrawny looking Atlas cedar as this year’s Christmas tree.

The Atlas cedar is actually a potted plant that can be replanted outdoors later on. In order to protect the floor in our apartment, we got a large plastic bucket that we could put the pot in. However, that bucket looked quite far from “Christmas-y” and after reading a catalogue from the fabric store “Stoff & Stil”, I was inspired to make a sack for the ugly bucket and some nice fabric hearts as Christmas decorations. The materials needed for this project was red and beige striped burlap, string to tie the sack together, thread, padding for the hearts and a bit of gold/beige yarn as hangers for the hearts.

To save some fabric, I decided to make the sack with a circular base and a large rectangle to go around it. I first measured the diameter of the bucket and added a bit of extra to make the sack a bit more fluffy. After that, I took a piece of pattern paper, folded it twice and with a pen and a ruler marked the radius +1cm for seam allowance. Based on the radius, I calculated the circumference of the circle and then cut out a rectangular piece (with seam allowance included).sack_for_christmas_tree_5When sewing, always try to sew the “flat things” first which is why I started with the top hem of the sack. After that, sew the rectangle into a tube and attach the tube to the circle. This was one of the easier things I’ve made in a long time :)

The pattern for the hearts can be found here.


2 Comments

Changing Pad

As my life changes, so will the content on my blog. In my last blog post I told you that I’m about to become a mother so maybe it doesn’t come as a big surprise that from now on, you’ll see a bit of baby stuff here as well :). The first thing I decided to make for the baby was a changing pad that would fit the changing table we got from IKEA.

I got both the fabric and the foam base for the changing pad from a store called “Stoff & Stil”. The goal was to make a pad that would be easy to clean but still nice and cosy for the baby. With that in mind, I decided it would be a good idea to make two covers for the foam pad. The first cover would be made out of a pastel green oil cloth with some geometric shapes on it. Since oil cloth is water proof, this would be the “easy to clean layer”. For the second cover (that’s was supposed to go over the first one), I got a soft cotton satin with grey and yellow raindrops on it. I thought the yellow raindrops was quite befitting a changing pad :)

Stoff & Stil also had a pattern for the changing pad but since the shape of the thing was so simple, I didn’t really see the point in spending money on something I could make myself in 30min. To begin with, I measured the sides and made a pattern for that. After the sides were finished, I measured the circumference of the pattern and the length of the foam base. With those measurements I had a rectangle that would go around the pad. Last but not least, a 1cm seam allowance was added. When the pattern was done it was time to start pattern matching and cutting out the pieces. Because of the very symmetrical geometrical shapes on the oil cloth, this turned out to be a walk in the park! To make the sewing a bit easier, I used a pencil to draw where the seam should go on both side pieces.

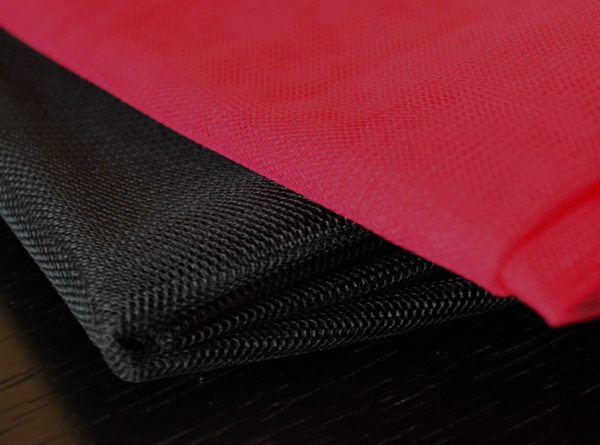
Assembling the whole thing was a bit trickier than usual because you obviously can’t use pins on a plastic oil cloth. That would just leave ugly puncture marks all over the place. Instead, I got to use these handy little clips from Clover that I got from Okadaya in Tokyo. The first step was to attach the invisible zipper. I can highly recommend inserting the zipper as soon as possible. It’s just so much easier to attach it to a garment/cushion/etc. when the fabric lies flat. Next, I continued sewing around the side where the zipper was attached. One stretch at a time was “clipped” together and sewn. When reaching the corners, I had to cut the oil cloth in order to continue with the next stretch without the fabric bulging into weird shapes. The same procedure was repeated for the other side and last but not least, the side seam on the large rectangle was sewn.

Yay, the first cover was done! At this point I had no idea that I would spend the coming 15min sweating and cursing while I was wrestling the foam base into the cover. Have you ever touched and eel and gotten surprised at just how slippery it is? Well, that pretty much describes my experience with the foam, only that the foam was the exact opposite of slippery. After I won the wrestling match, I decided that I wouldn’t be making a second cover. There is just no way I’m putting a cover on/off of that changing pad on a regular basis. Instead, I’ll probably make something like a towel/blanket to put on top of the changing pad. That way it would still be nice and cosy for the baby and easy to remove and throw in the laundry.


2 Comments

Curtains for the sewing room (+pattern for back-tab curtains)

The finished curtains!

The finished curtains!

With Christmas long gone, I think it’s time to change the curtains and let the light in to the room. This wonderful light linen fabric really puts me in the mood for springtime :)

Over the years, I’ve tried a number of different hanging mechanisms for the curtains I’ve made. For example, the simplest solution was one long tunnel for the curtain rod. It does the job but the top of the curtains tend to get all wrinkled and the “fall” of the fabric isn’t very pretty. I’ve also tried one of those ready-made bands that you just put some hooks in, and then all of a sudden the top of the curtain is pleated. It’s quick and easy and looks good. However, I’ve come to like the back-tab style of curtains very much. The last couple of times I’ve had to re-invent the pattern. I decided to put an end to that nonsense and make a pattern once and for all!

Pattern for the back-tabs

Pattern for the back-tabs/straps. The numbers (1,2,3) indicate in which order the seams should be sewn.

First cut out as many long strips with a width of 6cm as you need to make the tabs. The width of my fabric was 150cm and I needed to cut out 3 strips that were 6x150cm. Also cut the fabric in two so that you get two curtains. Next, hem all four length sides of the curtains with a 1,5cm hem. Also serge top and bottom.

Now it’s time to make the tabs. If you have a serger, serge the long sides of the 3 strips. Make two cardboard/paper patterns for the tabs. The first one should be 6x12cm and the second one 5x12cm. Use the first pattern to cut tabs from the long strips. Serge the two short sides of each tab. Don’t forget to chain sew the tabs (don’t cut the thread after one is finished, just continue with another). Now use the second pattern to quickly and easily press a 1cm seam allowance on both sides of the tabs. Chain sew the seam marked (1) in the pattern picture above ~0.5cm from the edge.

Next I attached the tabs to the curtains. Fold down the top of the curtains 14cm and press with an iron. Using the formula above, calculate the number of tabs/straps and the spaces in between them. (143-4*14)/(14-1) = 6.7cm => 14 tabs and 6.7cm in between. Pin the tabs with the short side 4cm from the top edge and sew 3cm from the top edge (seam marked with (2)). Fold the tabs down and pin them down. I like to baste stitch them before folding over 1cm of the edge. Sew the last seam marked (3).

Last step would be to try them on the curtain rod and finish the bottom hem. Aaaand you’re done!


1 Comment

Fabric shopping in Tokyo

There are so many different things that I love about Japan and the shopping is one of them. On the first trip I briefly explored Nippori Fabric Town in Tokyo and, while there are a lot of lovely stores there (Tomato is worth mentioning), my favourite store is called Okadaya. Since I simply refused to leave Japan without re-visiting Okadaya, I got to spend a couple of hours in my own fabric heaven :)

Street view, courtesy of Google Street View. A) Building with sewing material. B) Building with fabrics

Street view, courtesy of Google Street View. A) Building with sewing material. B) Building with fabrics

Finding Okadaya can be a bit tricky. It’s located (in 2!! buildings) in Shinjuku, a ~10min walk away from the huge train/metro station. I find their blue and white sign very modest compared to the neighbour’s and I think I walked past it more than 10 times the first time I was looking for it. In the first building you’ll find 6 floors filled with different kinds of sewing materials. They have a great selection of buttons, ribbons, threads, zippers, rulers, knitting material, you name it! There was sooo many beautiful ribbons and lace on one of the floors that I didn’t know what to do with myself. I wanted to get everything but the rational part of me talked me out of hoarding. This doesn’t mean that I left there empty-handed. I found a very cool black and white zipper (ok, I have no idea what I’m gonna do with it, but I definitely need it!). Then followed some regular hidden zippers. The price on these was amazingly a third of what I usually pay. The blue and orange thingamajigs from Clover are for keeping track of your knitting. At the moment I just use them to see how much I’ve knitted in one evening but I guess you could use them to keep track when knitting after a pattern. Next up is the magical “iron-on seam stabilizer”. I always use this to stabilize and prevent fraying around neckline and arm holes. The tiny clothes-pegs are for materials (e.g. leather) that you cannot pin together with regular pins. An awl may come in handy and the brown little thing beside the awl is a Japanese leather thimble. I’ve been using this kind of thimble for a while now and while it takes a bit of getting used to, I like it more than the regular ones in steel. On the bottom row are some corset supplies. I’ve wanted to make a corset for years and maybe it’s finally time I got started. Another thing that I’ve wanted to make is a recreation of an old bikini (that is falling apart now) and I got the padded cups for that reason. Last but not least, some buttons for a shirt and maybe a future Halloween costume.

The second building (just across the small street) contains 5 floors filled with beautiful and affordable fabrics. On the top is a rather heavy chequered cotton fabric that I intend to make a tight and rather sculptured dress of. The white cotton fabric under is very stiff and should work as a foundation for a corset. The brown/grey knit will become a top for a friend and the bright orange will become my new bikini! I’ve never even seen swim wear fabric in the stores at home so I’m very excited about this.Next up is something red and black that I was thinking of using for a Halloween costume. Can you guess what I have in mind? I this love the texture on the red and black fabric and I was pleasantly surprised to find this silk chirimen (crepe) in matching colours.

The shopping spree was finished with some tulle in black and some odd raspberry colour. At first I thought it was bright red but the lighting must have been a bit wonky. Not really sure what I should make of this but I always think of something.

Okadaya’s webpage: http://www.okadaya.co.jp/shinjuku/