 Baby nests have become very popular nowadays (at least in Sweden) and pretty much all parents either buy one or make one themselves. It’s a fun and easy project that everyone can make! In addition to the baby nest, I made two sheets to use inside the nest. In case an accident would happen, the sheets were lined with waterproof terry with an exception for where the baby’s head would be. The terry’s supposed to be “breathing” but I’m not taking any chances. That part of the sheets is instead lined with a mint cotton fabric.

For this project, I bought:
- 1m mint/green cotton
- ~1,2m cotton fabric with a harlequin pattern
- ~1m cotton fabric with sleeping owls
- ~1m waterproof white terry
- ~2,2m x 2,2m wadding
- ~3m mint/green bias binding
- light grey cord
- 1 cord stopper
This baby nest is suitable for a baby 0-4 months old.
The pattern for the baby nest is rather simple and you need to cut two pieces (A), one for the front and one for the back. Also cut 2-3 pieces of (B) wadding, depending on how thick your wadding is. Baste the pieces of wadding together so that they will keep their shape even when put in the washing machine. Trace 20 cm from the border on the back piece (A). This is where you will sew the back and front pieces together with the wadding in between. Pin right sides together (A) and leave an opening on both small half circles. Turn it right sides out and press the seam.
 Pin the bias binding around the baby nest, from the center of the first half circle to the other one. Sew it carefully in place. A good top stitching is what makes something look awesome instead of just ‘ok’. Use a safety-pin to pull the cord through the tunnel that the bias binding creates.
Put the wadding inside and baste it in place before sewing. I pinned it in place but it was difficult to get a good result and I had to re-do the seam. I would highly recommend basting instead of pinning. Fold the rest of the wadding to a long sausage and stuff it inside the opening on one of the sides. Sew the openings shut. Also sew the opening for the first wadding (B) shut and add some bias binding for a nice finish.
The sheets are pretty much the same size as (B) and if you want to make it only out of cotton fabric follow these instructions. Cut two pieces of the B pattern. With a seam allowance of 1cm, sew them face sides together but leave a small opening. Turn it right sides out. Give it a good press with the iron and then top stitch 2mm from the edge all the way around the sheet, now closing the opening.
If you want to use waterproof terry you need to make sure that you don’t put the plastic where the baby’s head will be. If you look at the picture below, the white is plastic terry and the mint is regular cotton fabric. In this case you cut one B piece for the front. Then cut the B pattern in two parts and add 1cm seam allowance to both pieces. Cut the top piece in cotton and the bottom in terry. Put the cotton and plastic facing each other and sew them together. Press the seam allowance to one side with your nails. Don’t use an iron for this or the plastic will melt! Top stitch the seam allowance in place. Then put the front fabric (in this case owl fabric) and plastic facing each other and sew them together but leave an opening. Turn it right sides out and top stitch to close the opening.
To finish of this quick guide, here’s the finished baby nest!
I planned on making a baby nest + sheets before the baby arrived and I was halfway through this “2 day” project when it was time to go to bed. Quite pleased with my progress, I said to my husband “The baby nest will be finished tomorrow and afterwards we can just sit back, relax and wait for her arrival”. This totally jinxed it as my water broke 2 hours later and our daughter Charlie was born the next morning. Let’s just say it took me more than two days to finish the baby nest. :)
 It’s been a while since I did any crocheting but I rediscovered it when my daughter was born. Pretty much all she wanted to do was eat and sleep, and my lap was the only bed she wanted to sleep in during day time. In the beginning it was quite relaxing to sit and watch Netflix all day long. However, after watching good TV shows, bad TV shows, good movies, good B-movies (Sharknado 1, 2 and 3 :)) and bad movies, I wanted to do something more creative with my time. The end result was this amish puzzle ball!


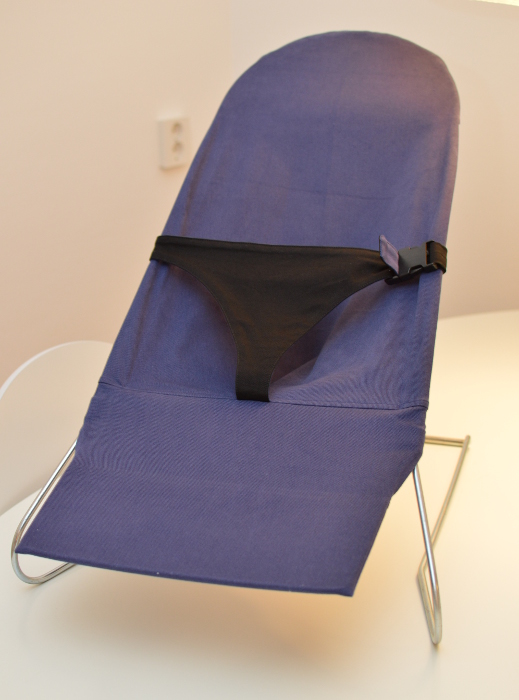
 When I told my mum that we were thinking about buying a BabyBjörn bouncer for Charlie, she said that there was no need for that since she had actually saved my old bouncer! The bouncer looked great but I wanted to upgrade it and give it a more modern look so I made a new cover (I think the old cover was made in West-Germany ;) ).

 Baby nests have become very popular nowadays (at least in Sweden) and pretty much all parents either buy one or make one themselves. It’s a fun and easy project that everyone can make! In addition to the baby nest, I made two sheets to use inside the nest. In case an accident would happen, the sheets were lined with waterproof terry with an exception for where the baby’s head would be. The terry’s supposed to be “breathing” but I’m not taking any chances. That part of the sheets is instead lined with a mint cotton fabric.

 Pin right sides together (A) and leave an opening on both small half circles. Turn it right sides out and press the seam.
 Pin the bias binding around the baby nest, from the center of the first half circle to the other one. Sew it carefully in place. A good top stitching is what makes something look awesome instead of just ‘ok’. Use a safety-pin to pull the cord through the tunnel that the bias binding creates.


 When sewing, always try to sew the “flat things” first which is why I started with the top hem of the sack. After that, sew the rectangle into a tube and attach the tube to the circle. This was one of the easier things I’ve made in a long time :)