Yuki Clothing

plain and simple


140 Comments

Baby nest

Baby nests have become very popular nowadays (at least in Sweden) and pretty much all parents either buy one or make one themselves. It’s a fun and easy project that everyone can make! In addition to the baby nest, I made two sheets  to use inside the nest. In case an accident would happen, the sheets were lined with waterproof terry with an exception for where the baby’s head would be. The terry’s supposed to be “breathing” but I’m not taking any chances. That part of the sheets is instead lined with a mint cotton fabric.

For this project, I bought:

  • 1m mint/green cotton
  • ~1,2m cotton fabric with a harlequin pattern
  • ~1m cotton fabric with sleeping owls
  • ~1m waterproof white terry
  • ~2,2m x 2,2m wadding
  • ~3m mint/green bias binding
  • light grey cord
  • 1 cord stopper

This baby nest is suitable for a baby 0-4 months old.

The pattern for the baby nest is rather simple and you need to cut two pieces (A), one for the front and one for the back. Also cut 2-3 pieces of (B) wadding, depending on how thick your wadding is. Baste the pieces of wadding together so that they will keep their shape even when put in the washing machine. Trace 20 cm from the border on the back piece (A). This is where you will sew the back and front pieces together with the wadding in between.Pin right sides together (A) and leave an opening on both small half circles. Turn it right sides out and press the seam.
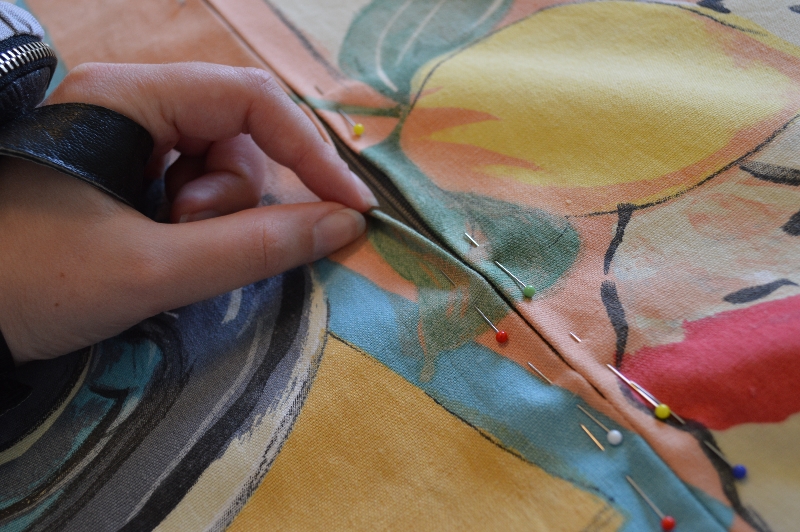
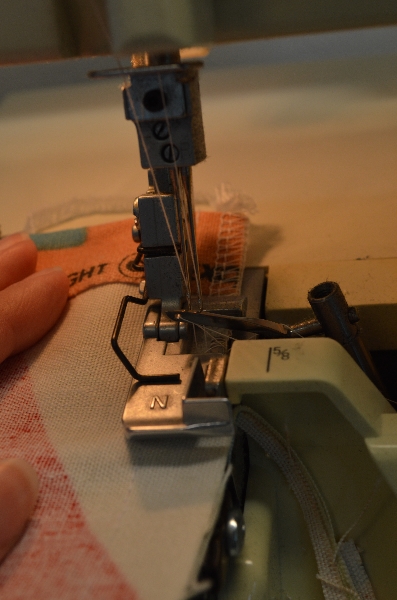
Pin the bias binding around the baby nest, from the center of the first half circle to the other one. Sew it carefully in place. A good top stitching is what makes something look awesome instead of just ‘ok’. Use a safety-pin to pull the cord through the tunnel that the bias binding creates.

Put the wadding inside and baste it in place before sewing. I pinned it in place but it was difficult to get a good result and I had to re-do the seam. I would highly recommend basting instead of pinning. Fold the rest of the wadding to a long sausage and stuff it inside the opening on one of the sides. Sew the openings shut. Also sew the opening for the first wadding (B) shut and add some bias binding for a nice finish.

The sheets are pretty much the same size as (B) and if you want to make it only out of cotton fabric follow these instructions. Cut two pieces of the B pattern. With a seam allowance of 1cm, sew them face sides together but leave a small opening. Turn it right sides out. Give it a good press with the iron and then top stitch 2mm from the edge all the way around the sheet, now closing the opening.

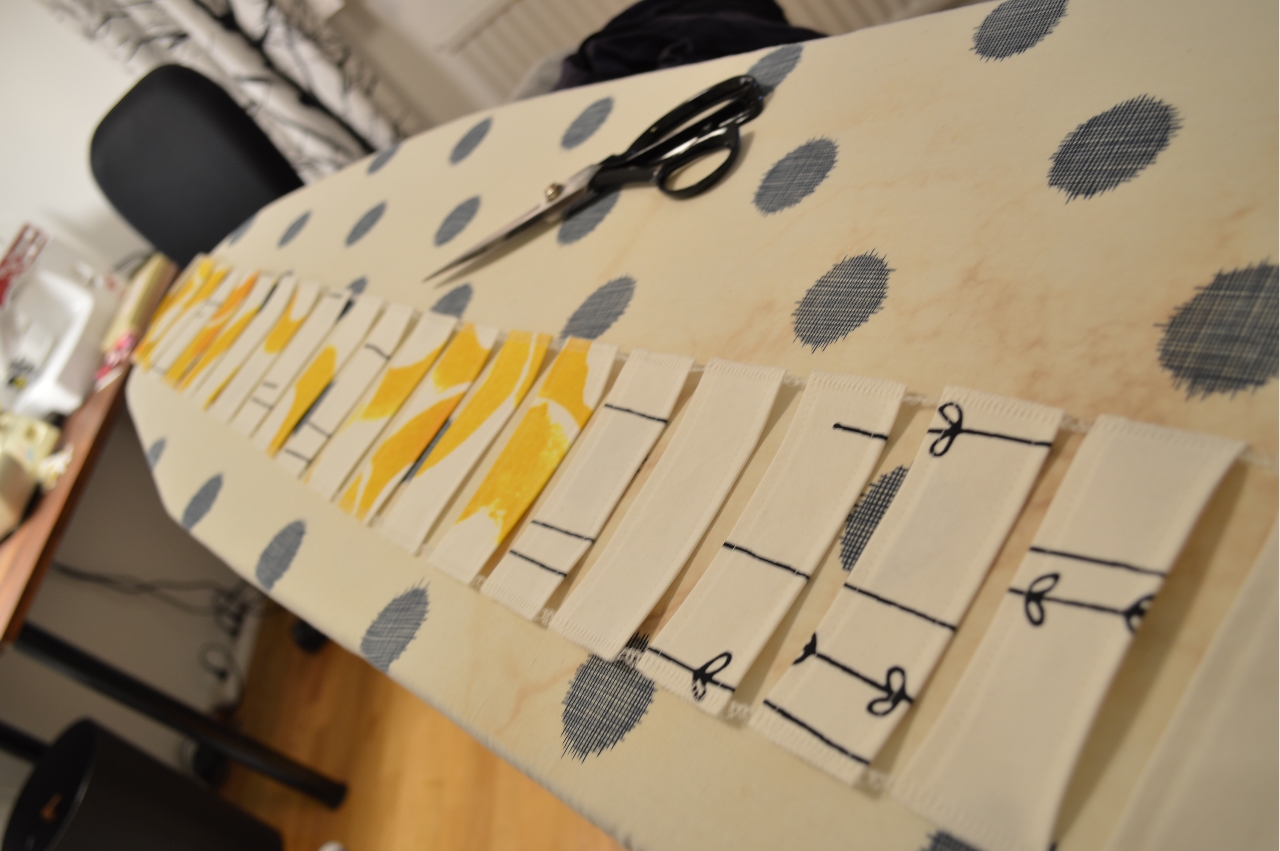
If you want to use waterproof terry you need to make sure that you don’t put the plastic where the baby’s head will be. If you look at the picture below, the white is plastic terry and the mint is regular cotton fabric. In this case you cut one B piece for the front. Then cut the B pattern in two parts and add 1cm seam allowance to both pieces. Cut the top piece in cotton and the bottom in terry. Put the cotton and plastic facing each other and sew them together. Press the seam allowance to one side with your nails. Don’t use an iron for this or the plastic will melt! Top stitch the seam allowance in place. Then put the front fabric (in this case owl fabric) and plastic facing each other and sew them together but leave an opening. Turn it right sides out and top stitch to close the opening.

To finish of this quick guide, here’s the finished baby nest!

I planned on making a baby nest + sheets before the baby arrived and I was halfway through this “2 day” project when it was time to go to bed. Quite pleased with my progress, I said to my husband “The baby nest will be finished tomorrow and afterwards we can just sit back, relax and wait for her arrival”. This totally jinxed it as my water broke 2 hours later and our daughter Charlie was born the next morning. Let’s just say it took me more than two days to finish the baby nest. :)


2 Comments

Curtains for the sewing room (+pattern for back-tab curtains)

The finished curtains!

The finished curtains!

With Christmas long gone, I think it’s time to change the curtains and let the light in to the room. This wonderful light linen fabric really puts me in the mood for springtime :)

Over the years, I’ve tried a number of different hanging mechanisms for the curtains I’ve made. For example, the simplest solution was one long tunnel for the curtain rod. It does the job but the top of the curtains tend to get all wrinkled and the “fall” of the fabric isn’t very pretty. I’ve also tried one of those ready-made bands that you just put some hooks in, and then all of a sudden the top of the curtain is pleated. It’s quick and easy and looks good. However, I’ve come to like the back-tab style of curtains very much. The last couple of times I’ve had to re-invent the pattern. I decided to put an end to that nonsense and make a pattern once and for all!

Pattern for the back-tabs

Pattern for the back-tabs/straps. The numbers (1,2,3) indicate in which order the seams should be sewn.

First cut out as many long strips with a width of 6cm as you need to make the tabs. The width of my fabric was 150cm and I needed to cut out 3 strips that were 6x150cm. Also cut the fabric in two so that you get two curtains. Next, hem all four length sides of the curtains with a 1,5cm hem. Also serge top and bottom.

Now it’s time to make the tabs. If you have a serger, serge the long sides of the 3 strips. Make two cardboard/paper patterns for the tabs. The first one should be 6x12cm and the second one 5x12cm. Use the first pattern to cut tabs from the long strips. Serge the two short sides of each tab. Don’t forget to chain sew the tabs (don’t cut the thread after one is finished, just continue with another). Now use the second pattern to quickly and easily press a 1cm seam allowance on both sides of the tabs. Chain sew the seam marked (1) in the pattern picture above ~0.5cm from the edge.

Next I attached the tabs to the curtains. Fold down the top of the curtains 14cm and press with an iron. Using the formula above, calculate the number of tabs/straps and the spaces in between them. (143-4*14)/(14-1) = 6.7cm => 14 tabs and 6.7cm in between. Pin the tabs with the short side 4cm from the top edge and sew 3cm from the top edge (seam marked with (2)). Fold the tabs down and pin them down. I like to baste stitch them before folding over 1cm of the edge. Sew the last seam marked (3).

Last step would be to try them on the curtain rod and finish the bottom hem. Aaaand you’re done!


Leave a comment

Cushion cover (how-to)

As I sit down to write about my latest project I can’t help but smile as my mind wanders off to that episode of Coupling where Susan and Steve are trying to buy a sofa but Steve goes off on a rant about the devious cushions. It’s pretty hilarious but you know what’s worst about his rant? It’s that he’s actually, to large extent, right. :) Have a look for yourself. Here’s a link to YouTube.

This cushion project isn’t for myself but for my mum. She bought this designer fabric and asked me to make her a 60x60cm large cover. To begin with, I cut the fabric into two 63x63cm pieces (1.5cm seam allowance). Since I only had a normal zipper and not an invisible one, I wanted to hide it a bit. With the zipper being slightly smaller (around 50cm), I began by sewing the pieces face sides together but leaving an opening for the zipper (slightly smaller than 50cm). With the iron, press a crease where there would’ve been a seam if not for the zipper. Then place the zipper under the opening and pin it in place.

From the front side, sew the zipper in place. I often feel that the fabric stretches a bit and to counter this, I never sew around the zipper. Instead I sew one side first, then start again from the top and sew the other side. This way the zipper will be equally “crooked” on both sides :) My narrow presser foot is 0.5cm wide and steering it close and parallel to the zipper gives me a nearby perfect seam.

Here’s how the zipper looks at this stage! Will you look at that insanely good pattern matching! The funniest thing is that I didn’t even notice it until now that I was going through the pictures.

Sewing the zipper was the hard part. Now just pin the cushion cover with face sides together and sew all the way around. Don’t forget to open up the zipper a bit, it makes things a bit easier later on. Finish the edges with zigzag or a serger if you’ve got one.

Last by not least, turn the wonderful creation right side out! I like to use my cooking chopsticks for the corners. They’re small enough to do a good job but blunt enough to not damage the fabric.


Leave a comment

How to hem jeans with the original hem (magic hem)

I’ve always been quite short, and growing up I always had to re-hem every new pair of trousers I got. Back then, I  simply cut off some of the length and made the hem from scratch. While I ended up with jeans of a more suitable length, I always felt that the clean, new hem didn’t match the rest of the look. If only I had known about the “magic hem”!

The instructions given in the video aren’t always clear so I recommend that you watch it closely to get a hang of what Mr. Hyi Lim is doing. I’ve seen a couple of other videos on the subject as well but those were forgetting one detail. That is to hide the seam allowance/left-over fabric inside the hem. If you follow the instructions in this video, you should end up with a neat looking result both on the outside and the inside.

I can’t wait to try this out. I almost feel like buying a pair of jeans in the wrong size, just for the sake of it!


3 Comments

How to sew more efficiently – Chaining

Do you sew each piece, cut the threads and then start the next? Then you’re not alone, that’s exactly what I’ve been doing for quite some time. If you instead of cutting the thread, continue with the next piece you’ll save both time and thread. After you’ve finish everything that can be chained together, cut the threads and tada! – finished!

Chaining like a boss! Here with hanging straps for my new curtain.

Chaining