
Black dress inspired by Lady Gaga’s origami dress
Inspiration for this dress came from Lady Gaga, and the beautiful origami dress(es) she’s worn on several occasions.

Back of the dress with the zipper.
To get that stiffness in the skirt, it’s made from a black furniture fabric and corset ribs. Also the top part uses ribs to make it stay in place. On the right shoulder, there are two black buttons for decoration. There’s a large, black visible zipper in the back to match the fabric choice.
When I made this, a couple of years ago I was a bit heavier (something which I had totally forgotten by the time I was doing some last-minute preparations for this New Years). Half a day left and my dress looked like a bloody tent… what to do, what to do? I know, add a belt! Hm.. not good enough since the waist line is a bit low it just looks funky. So, I grabbed some left-over fabric from a skirt, sewed it together real quick and attached it to the dress with the super elastic belt. When I got to the party, the first comment was “omg, that looks so Tim Burton/Helena Bonham-Carter-ish – but in a good way! Wait, what now… is that That dress?”. Here we go, this is apparently what you get when you mix Lady Gaga and Tim Burton!
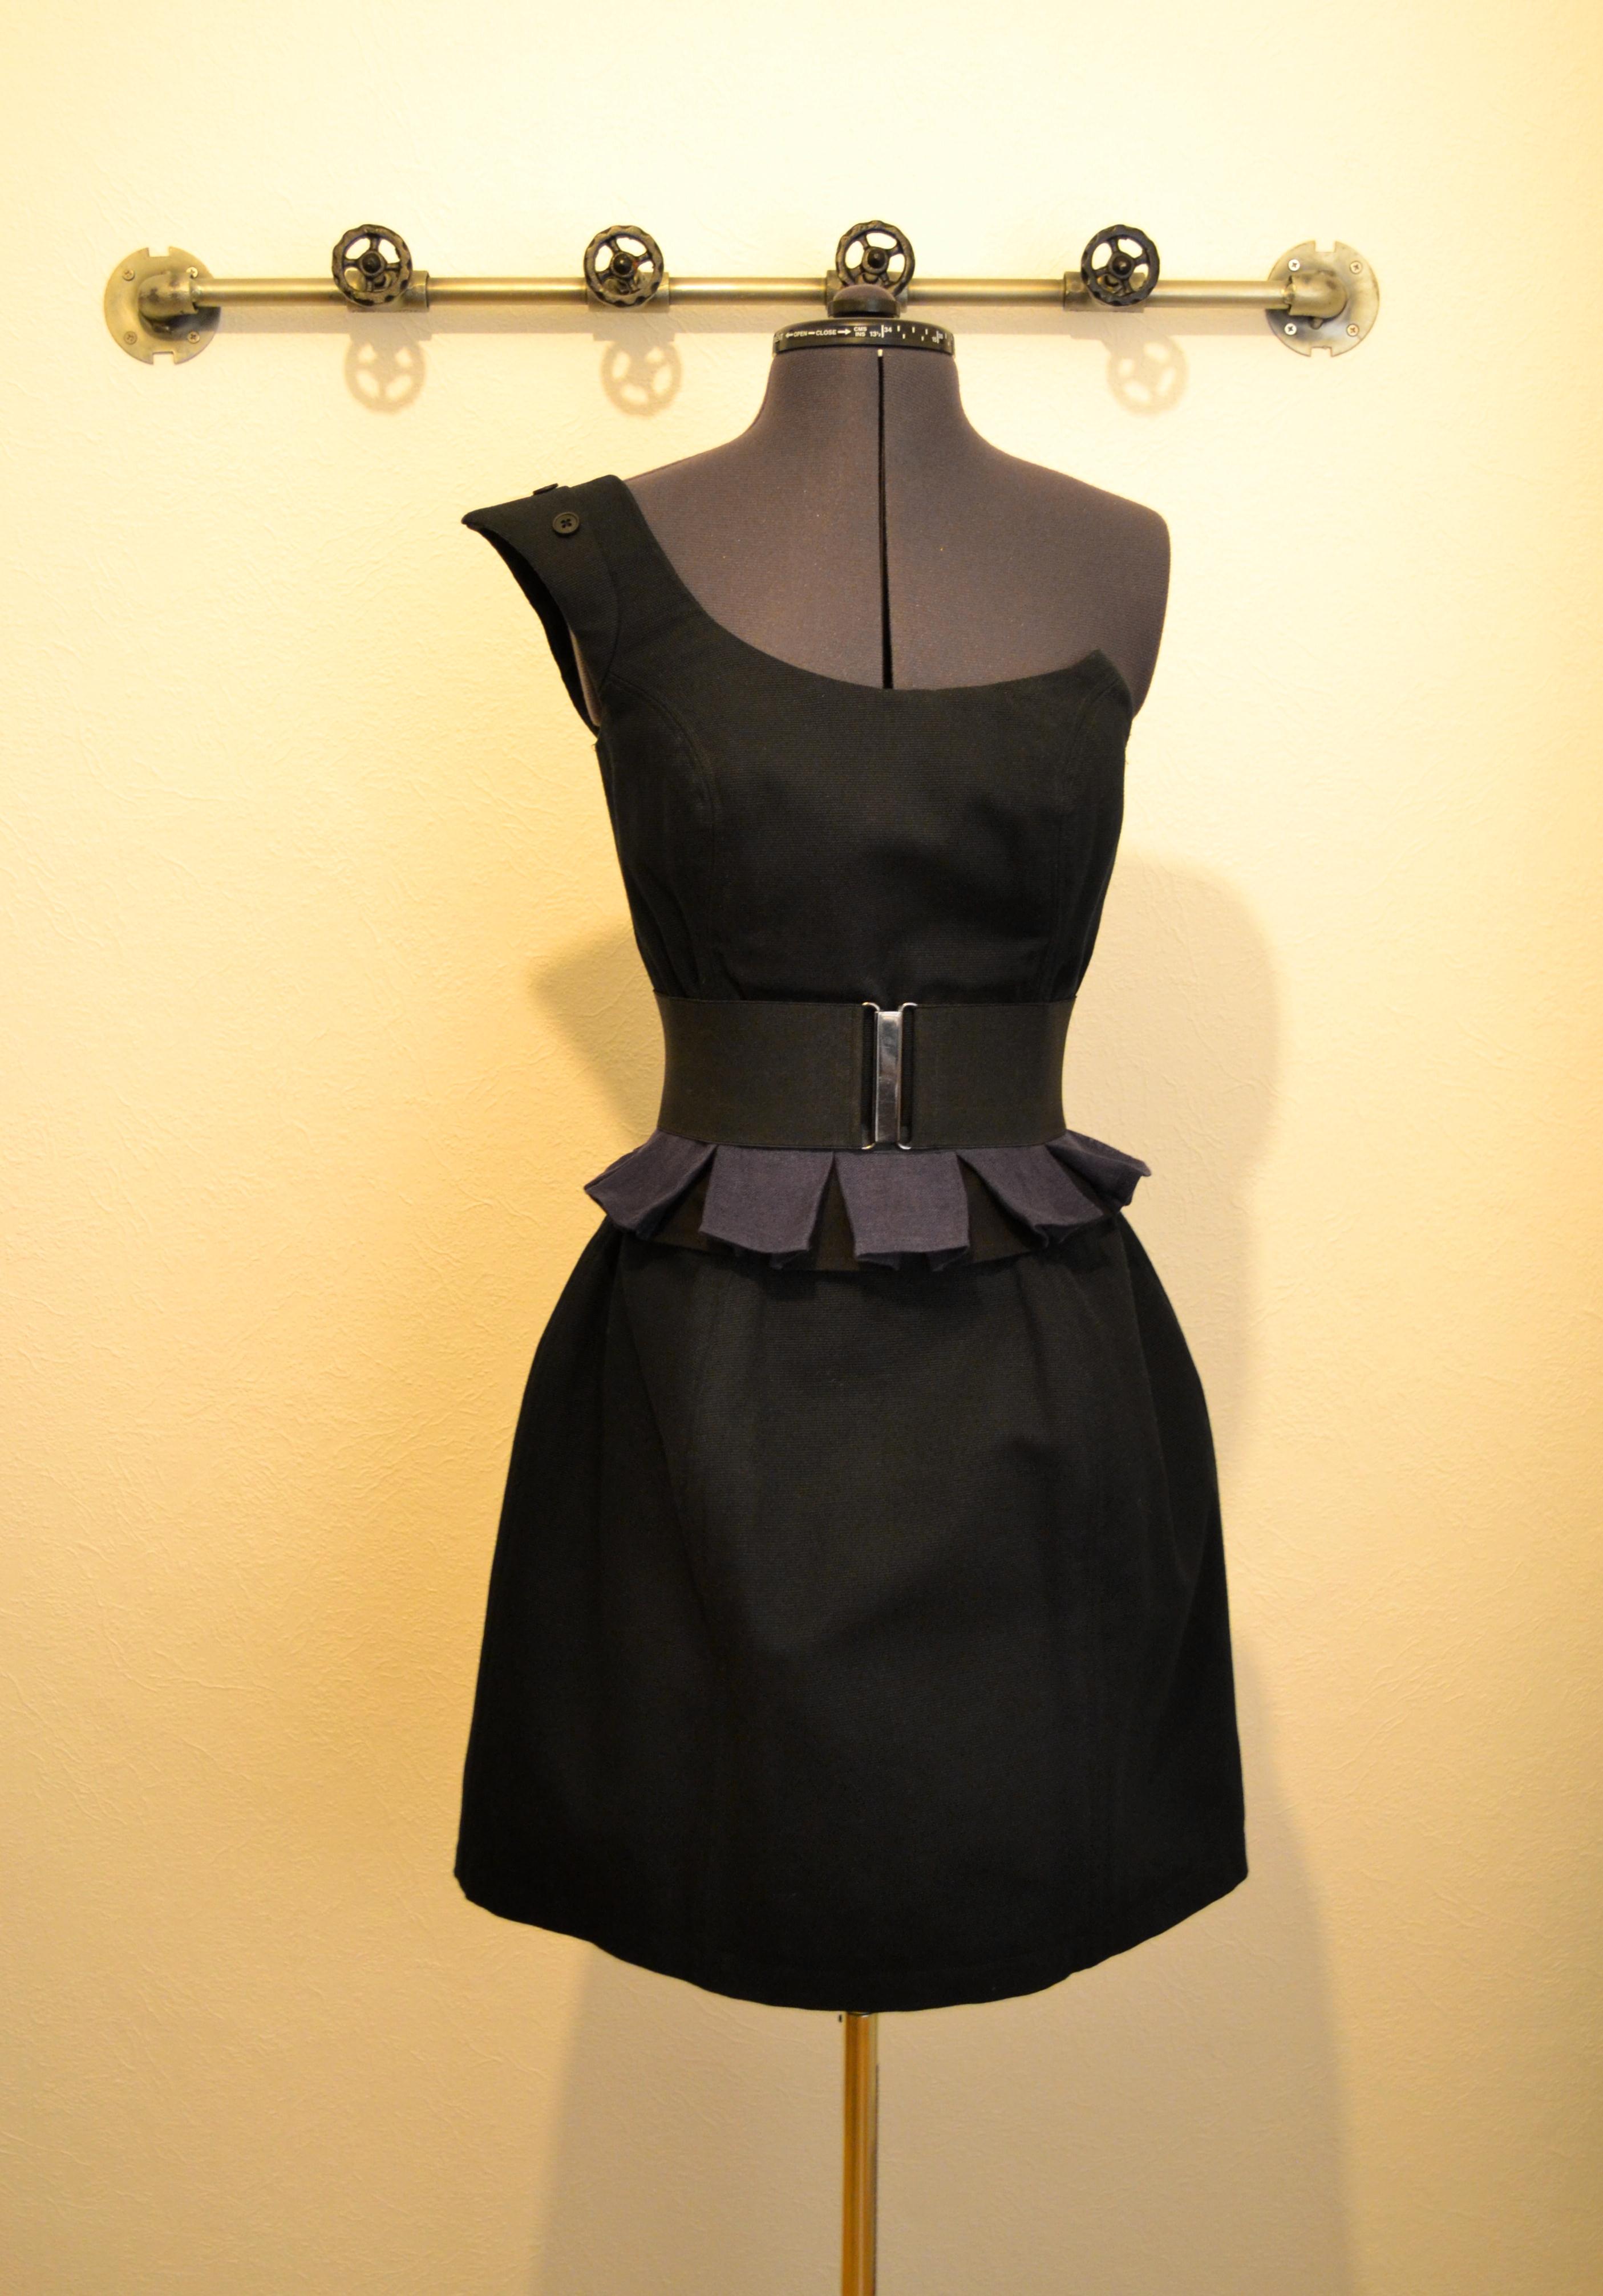
Lady Gaga + Tim Burton = this thing