Yuki Clothing

plain and simple


4 Comments

Yellow Asymmetrical Neckline Dress

This third version of the “asymmetrical neckline dress”, was a little something I started working on right before Easter (hence the colour). I wanted a nice and comfortable dress that I could wear at home so I decided to make it in this wonderful yellow jersey that I bumped into at the fabric store.

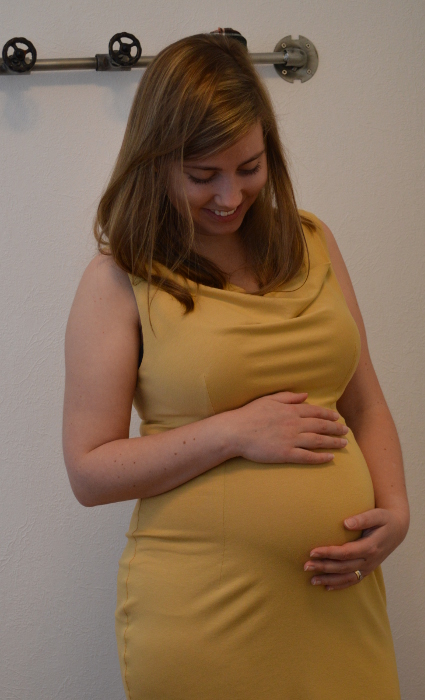
I was also interested in seeing how the jersey would drape compared to the other fabrics. Even though it’s the same pattern, it looks quite different from both the tartan and the graphite dress. The other two fabrics had a bit more structure compared to this one, which basically lives a life of its own.

For more information about the pattern, check out Asymmetrical Neckline Dress – making the pattern

Now you might think that I’ve been holding onto this since Easter (when I was supposed to have finished the dress). Problem was that a bunch of other stuff got higher priority, like making a new dress for a spring wedding we were attending. Then I got very tired and nauseous which didn’t exactly put me in the mood for finishing the dress. Now that I finally had the time and energy to finish it, it doesn’t really fit like I thought it would when I started in April ;)


3 Comments

Tartan Asymmetrical Neckline Dress

By now, I wouldn’t be surprised if some of my loyal readers started to wonder if I ever made a tartan asymmetrical neckline dress. Did I perhaps give up after making the necktie? I certainly did not! Did I have the energy to blog about it? Nope, sadly I did not. But better late than never! :)

The main fabric for the dress is a medium heavy cotton fabric with a tartan print. Its properties are similar to my usual muslin fabric from IKEA, only a bit thicker. For the lining of the skirt, I used a regular lining fabric (probably polyester). The graphite version of this dress didn’t have a lined skirt and the only reason for that was that the inside of that fabric is very sleek as it is. The cotton however, needed lining, otherwise I would’ve ended up with a skirt moving higher and higher up my thighs.

An improvement from the graphite version of the dress are the belt loops. Since the tartan pattern changed between the skirt and the top, it would look much better with a belt. And to keep a belt in place, you need belt loops :) Another detail worth mentioning is the “chain sewed” thread that attaches the under skirt (lining) to the outer skirt. This keeps the under skirt from sliding around.

I’ve also included a neat way of sewing darts and fastening the thread. Just start sewing your dart and when you’re close to the edge, carefully sew a couple of stitches parallel to the edge. After the parallel stitches, steer the needle over the edge and sew ~1-1.5cm without any fabric. Stop sewing, lift the presser foot and move the fabric towards you. Now sew a couple of stitches on the dart to fasten the thread. It’s quick and easy and the result looks great every time.


9 Comments

Asymmetrical Neckline Dress (part3) – the Graphite Dress

It’s time to show you the final version of the Asymmetrical Neckline Dress! If you’re interested in how the pattern was constructed and how the muslin turned out, you can read about it here and here.

The fabric for this dress is something I picked up on our first trip to Japan. While in Tokyo, we paid a visit to Tomato, a really nice fabric store in Nippori (Fabric Town), and there the it was! The fabric was just sitting on its shelf, waiting for me to bring it home. :) My original plan for it was to make a blazer or something but as soon as I started planning this dress I knew I had to use it. I love how well it drapes, and the colour is just gorgeous.

And of course, you’ll get some pictures from the wedding I wore the dress to. The weather was great during the afternoon. It was quite windy but the sun was shining brightly. This meant that my hair was all over the place, and looking into the camera wasn’t an easy task.


1 Comment

Asymmetrical Neckline Dress (part2) – the muslin

In a previous post, I wrote about making the pattern for this dress and now it’s time to show you what the final product could look like. As you can see, the cotton muslin is a tad bit see-through and enables you to see what the interfacing looks like as well as the outside.

I designed this dress with one thing in mind – to fool people in to thinking that I’ve got an hourglass figure. My body type is actually a mix of pear and hourglass and whenever I gain weight, the pear shape gets more emphasized. For example, if I compare my measurements with H&M’s sizes (who seem to be making clothes for skinny, rectangular people), my bust is 38, waist 36 and hip 40. With this data in mind, I wanted to make my bust appear a bit bigger. I think I succeeded with the front of the dress, however… the back side is another story. The shape of the skirt doesn’t exactly draw the attention away from a certain area.


12 Comments

Tamoto dress

I promised you some pictures of me wearing the finished Tamoto dress and I reckon it’s about time I got around to doing that. Now that I’ve worn it a couple of times, what do I think of it? Well, I think I’ve fallen even deeper in love with it. It’s just plain awesome.

Me in the Tamoto dress. In the background you see the bedspread project

Me in the Tamoto dress. In the background you see the bedspread project

Apparently, I’m not the only one who likes it and I was asked for the pattern (Yay! *happy dance*). When I get back from my ski travel I will definitely look in to making a pdf pattern for the dress. Only trouble is that I need to learn how to grade my pattern. I’m also a bit unsure about how to make a pdf with a full size pattern. Making one with a down sized pattern that fits on one page is super easy but making it bigger could potentially give me some grief. If you’ve got any tips/tricks/ideas on the subject, please leave a comment!