Yuki Clothing

plain and simple


13 Comments

Wedding Dress – Making preparations and the art of telling right from wrong

Off-white silk fabric in the front and Vlieseline in the background

Off-white silk fabric in the front and Vlieseline in the background

Preparations

It’s always nice to prepare for a new sewing project by cleaning out old stuff. It gets you off to a nice start, don’t you think?

  • the sewing table has been clear of old fabric scraps
  • the waste basket has been emptied
  • the usual pins have been removed from the pin cushion and replaced by new, much thinner pins (because I’m working with silk)
  • the sewing machine has gotten a new, thinner needle. (I know I should change needle much more often and I just don’t know why I don’t do it. Work it ’til it break maybe?)
  • the dinner table’s been cleared to function as a cutting table
  • all the fabrics have been fetched from the wardrobe.
New pins, yay!

New pins, yay!

The fabrics

The fabric’s got a nice little story of its own and it actually makes my feelings for this dress even stronger. My friend Mia went to Bangladesh to study for a while and one day she sent me an email asking me if I wanted some fabrics. She was getting some for herself to make this gorgeous dress (her blog’s in Swedish but I guess you can enjoy the pictures anyway). My answer was of course “yes, yes, YES!!”. A month later she delivered 8 yards off-white silk and 8 yards silk chiffon in the same beautiful colour. I know I’ve said it before but, thank you! These fabrics truly are amazing :D
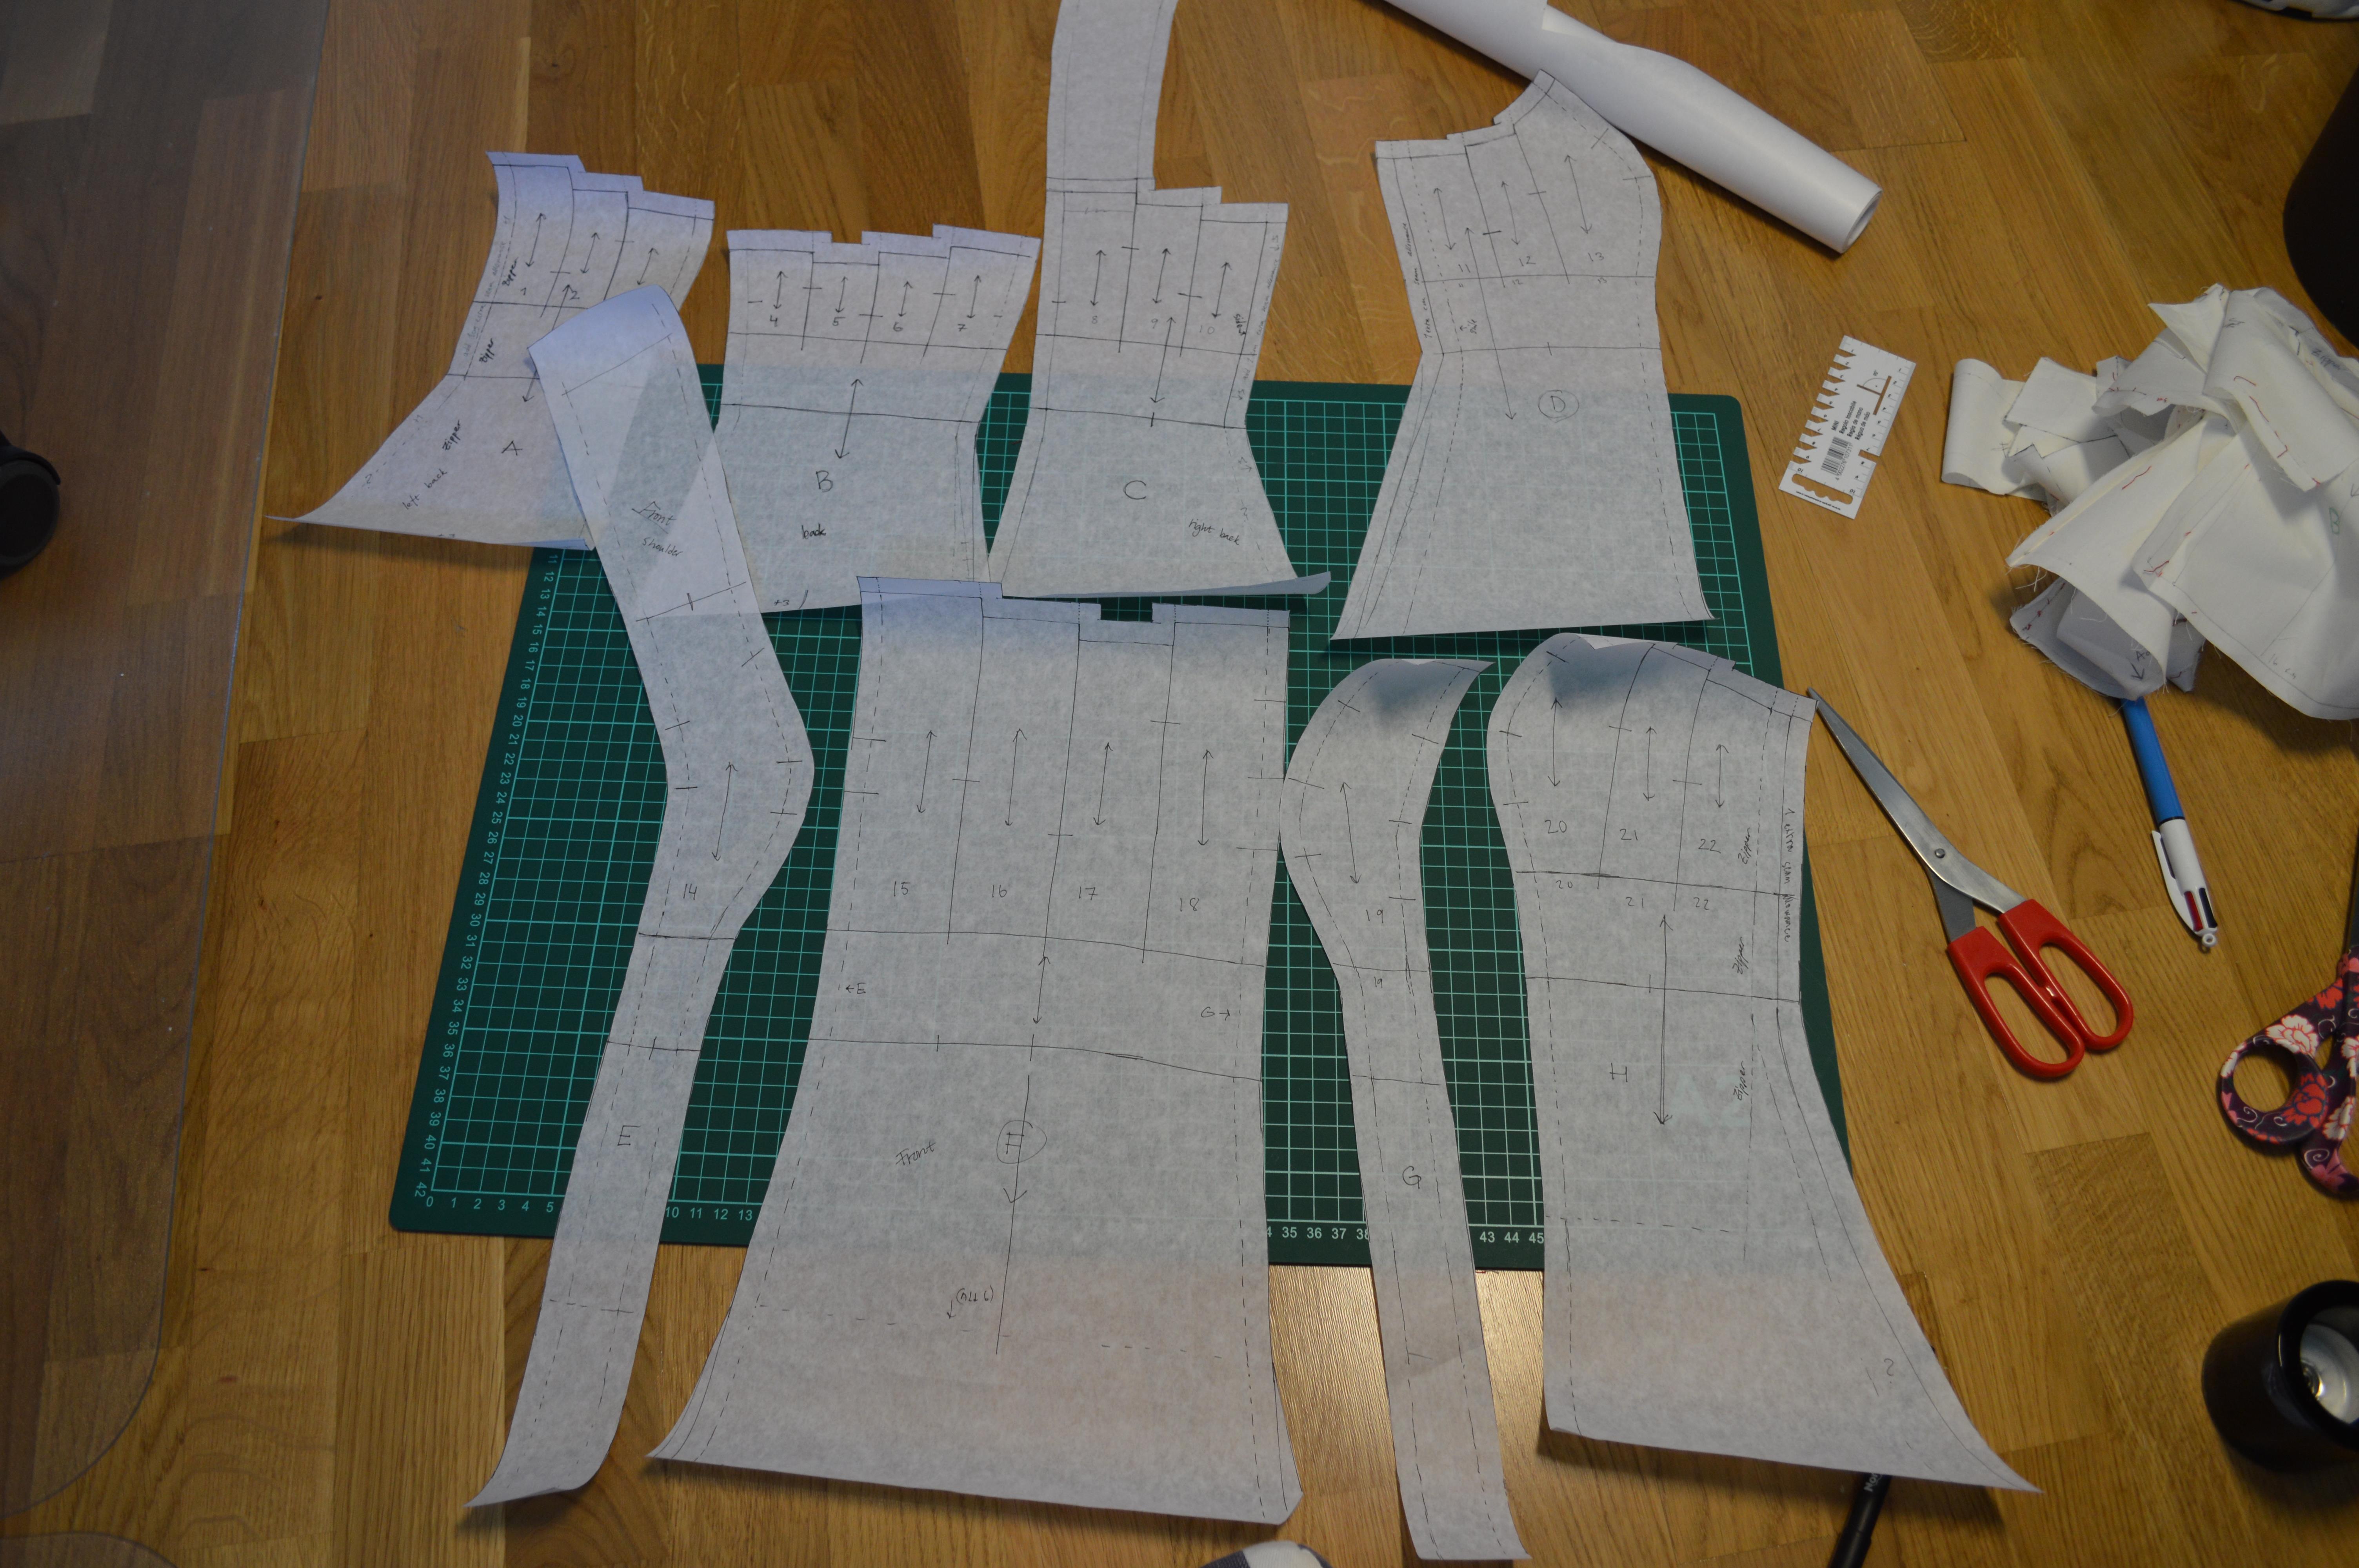
Right… or wrong?

Telling right from wrong used to be so easy...

Telling right from wrong used to be so easy…

When all preparations were done, I was faced with a tough decision. Which side of the fabric is the right one!? It’s not like there’s much of a difference :S. However, I think one side feels a little smoother so I went with that one. I did ask my fiancé for advise as well but he just confused me even more since the thought the other side was the face side. In the end, we reached the conclusion that it probably as a good idea to go with the supposedly ‘smoother side’ . Besides, no-one is going to notice as long as I always use one of the sides as face. ;)


2 Comments

Wedding Dress – Round 2 (the final pattern)

The muslin pattern before cutting and unpicking the seams.

The muslin pattern before cutting and unpicking the seams.

The first draft of the pattern was pretty good but I realized that it wasn’t fitted properly over the bust when I made my first mock-up using the pattern pieces from the draft. The necessary adjustments were made and luckily I got my friend to help me pin the dress onto me. At that point, virtually all pattern pieces were different in size but in most cases that’s actually a good thing and I’m not an exception. Like most women, my breasts are not the same size and this becomes apparent when I’m making a really fitted garment.

Speaking of breasts, I bought a new strapless bra (Wonderbra really is awesome :))! Buying it allowed me to start working on the neckline. A word of advise, when possible, try to adapt the dress to the bra. It’s much easier than going on a hunt for the perfect bra that will suit that dress.

When I was happy with the pattern, each part was marked with a number for the smaller parts and a letter for the larger parts. Since the neckline is very asymmetrical, I had to indicate with simple lines where the pieces should be fitted together. To force the fabric to lay flat, I unpicked the seams for the larger pattern pieces (A-H). However, I left the waistband in one piece since I don’t want that split into a million pieces as well. Last but not least, I transferred the pattern from fabric to paper.

All the large pattern pieces for the dress, transferred onto paper.

All the large pattern pieces for the dress, transferred onto paper.


Leave a comment

Sayōnara, lousy mobile camera!

phoneThe day has finally come when it’s time to bid my old (mobile) camera farewell. It’s not really broken or anything, it’s just that I need something better. And here it is, ‘something better’, my new camera! All I need to do now is learn how to use it properly. To be honest, I didn’t buy it just for the blog, it’s more of an early wedding present to ourselves. With this, we’re ready to explore Japan :)

To commemorate the end of an era, here’s the last photo taken with my old camera. Welcome Nikon D3200!

NikonD3200


2 Comments

Chocolate Cupcakes

Chocolate cupcakes with nutella buttercream

Chocolate Cupcakes with Nutella Buttercream

As I wrote earlier, I attended a cooking class last week. So, for this years midsummer festivities, I of course had to put my new skills to the test! We didn’t really learn how to make the actual cakes which meant I had to search for, and try out a new recipe. Like always, I was a bit nervous but they turned out great :D Since a couple of my friends even asked for the recipe I thought I’d post it.

Cupcakes (~12-14)

2 eggs
2.5 dl sugar
70g butter
100g dark chocolate
100g flour
1 tsp baking powder
40g cacao powder
a pinch of salt
0.5 dl milk
1) Turn on the oven (170C). Chop up the chocolate and melt the butter in a saucepan. Turn off the heat when the butter’s melted and add the chocolate. Stir until you get a smooth mixture. Let it cool down for a while.
2) Whisk egg and sugar until white and fluffy. Add the chocolate/butter mixture and whisk until it’s distributed evenly.
3) Mix flour, cacao, baking powder and salt. Sieve and add to the egg/chocolate mixture. Whisk until smooth.
4) Add milk a little at a time and whisk until smooth.
5) Prepare the muffin forms and pour in the mixture. Fill about ½ of each form.
Bake for ~10-12min in convection oven. Note that the baking time differs quite a lot depending on your oven. I think I had to bake the cupcakes for ~17min. Check if the cupcakes are ready using a toothpick. They’re supposed to be a little runny. Let the cupcakes cool down before adding the buttercream!

Nutella Buttercream (~15-20 cupcakes)

200g Nutella
200g butter
500g icing sugar
75g cocoa powder
1) Mix butter and Nutella until well combined.
2) Gradually add sieved icing sugar and cocoa powder. (Make sure that the mixture is firm but not too firm. You might not need all the icing sugar. I only used ~300g.)
3) Pipe onto cupcakes! I strongly recommend buying a nice icing syringe for this exercise. Why you ask? Well let’s just put it this way, the buttercream is brown and you want to make sure that it doesn’t resemble something completely different :)
4) Add some decorations to please the eye as well as the mouth.


Leave a comment

One step closer to Japan!

<For those of you who doesn’t know me irl, me and my fiancée are spending our honeymoon in Japan.>

Fuji-san_featI must say that I feel extremely relieved now that we finally got around to buying the flight tickets. I’ve been watching the price for about a month now and this last week I’ve grown more and more irritated about 3 things.

  1. The price flux like crazy (we’re talking 5000 sek/570 euro/750 usd/73000 yen). At least in my part of the universe, that’s a shitload of money.
  2. Whenever I see a nice price for the flight I want seats on, the darn price change when I go to the travel agency that sells the tickets. What’s up with that?
  3. All travel agencies seem to be crooks. Either their service is lousy or they take your money (double-charging, charging but not making any flight reservation..). It feels like choosing between plague or cholera (<- lovely Swedish saying :) ).

After spending a considerable amount of time cursing the different travel agencies, we ended up directly at Japan Airlines home page. And wow, what a difference! The page is actually easy to navigate and booking the correct flight for the right price was super easy. If I understood everything correctly, I get to bring 23x2kg luggage with me. How sweet is that? Now I just hope they serve us a nice obento or sushi on the plane.