Yuki Clothing

plain and simple


Leave a comment

This year’s batch of lilac cordial

Lately I’ve been so busy with work and house hunting that my hobby’s been suffering. I’ve hardly had time to even look at my sewing machine! For a moment, it even looked like I wouldn’t have time to make this year’s batch of lilac cordial but then dad came to my rescue. :) He kindly offered to pick some flowers for me and bring them over while he was waiting for the paint to dry on the house. Now, five days later the cordial is finished and I’m much more pleased with it this year. I added one extra lemon for a more sour taste and let it sit for five days instead of three. The taste is great, and don’t you just love the colour!

Does it sound interesting? Well then, hurry on out and pick some flowers before they wither! Check out the recipe here, it’s super easy :)


Leave a comment

Cushion cover (how-to)

As I sit down to write about my latest project I can’t help but smile as my mind wanders off to that episode of Coupling where Susan and Steve are trying to buy a sofa but Steve goes off on a rant about the devious cushions. It’s pretty hilarious but you know what’s worst about his rant? It’s that he’s actually, to large extent, right. :) Have a look for yourself. Here’s a link to YouTube.

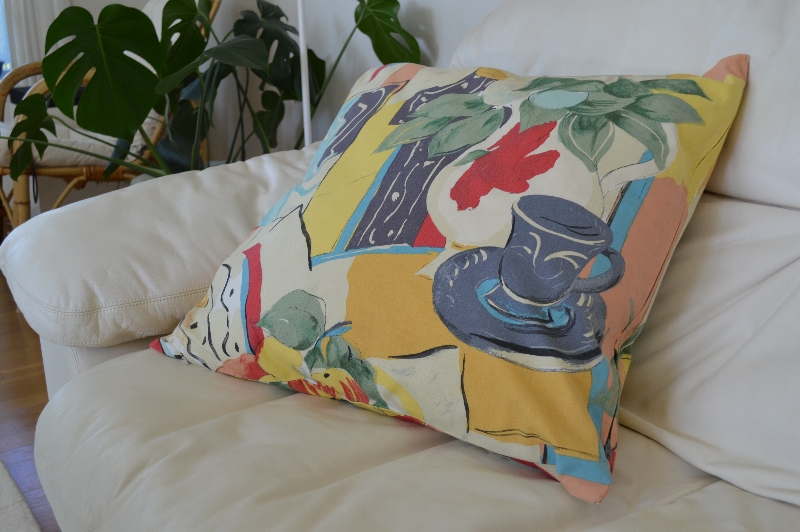
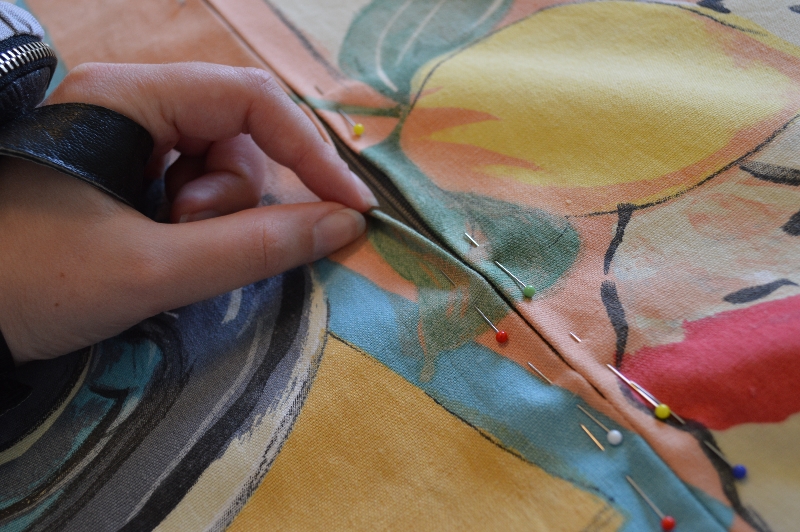
This cushion project isn’t for myself but for my mum. She bought this designer fabric and asked me to make her a 60x60cm large cover. To begin with, I cut the fabric into two 63x63cm pieces (1.5cm seam allowance). Since I only had a normal zipper and not an invisible one, I wanted to hide it a bit. With the zipper being slightly smaller (around 50cm), I began by sewing the pieces face sides together but leaving an opening for the zipper (slightly smaller than 50cm). With the iron, press a crease where there would’ve been a seam if not for the zipper. Then place the zipper under the opening and pin it in place.

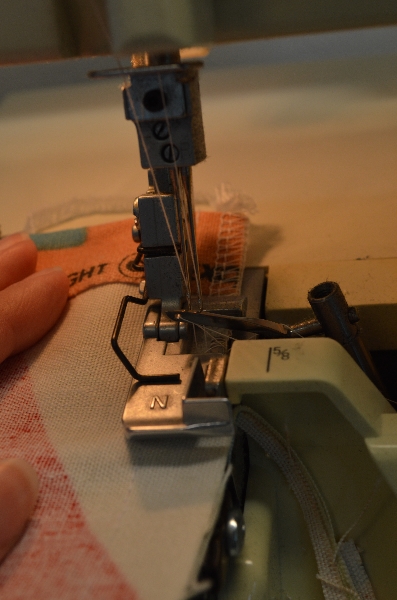
From the front side, sew the zipper in place. I often feel that the fabric stretches a bit and to counter this, I never sew around the zipper. Instead I sew one side first, then start again from the top and sew the other side. This way the zipper will be equally “crooked” on both sides :) My narrow presser foot is 0.5cm wide and steering it close and parallel to the zipper gives me a nearby perfect seam.

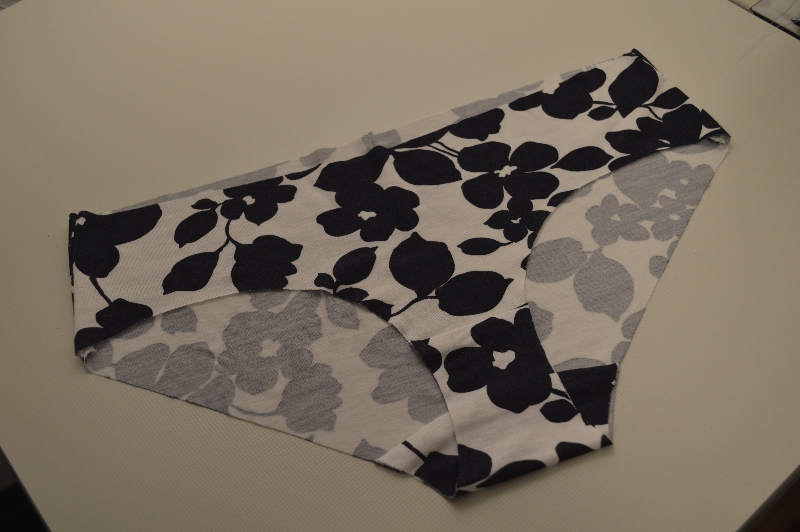
Here’s how the zipper looks at this stage! Will you look at that insanely good pattern matching! The funniest thing is that I didn’t even notice it until now that I was going through the pictures.

Sewing the zipper was the hard part. Now just pin the cushion cover with face sides together and sew all the way around. Don’t forget to open up the zipper a bit, it makes things a bit easier later on. Finish the edges with zigzag or a serger if you’ve got one.

Last by not least, turn the wonderful creation right side out! I like to use my cooking chopsticks for the corners. They’re small enough to do a good job but blunt enough to not damage the fabric.


4 Comments

Finished flowery knickers

Here they are, my finished and almost perfect Muji-copycat knickers! I decided to use the white elastic instead of black and I think it looks rather good. Thanks Emmely for your advise, it’s always nice to have a second opinion!

I’m very satisfied with the shape of the knickers. They fit me perfectly. There’s just one fitting issue and that is the elastic around the legs. I tried it on before sewing but somehow they still ended up being a bit too tight. I suspect that the tightness is the reason why I had so much trouble with skipped stitches in the zigzag seam (see picture below). But then again, this was the first time I had to “rebuild” my sewing machine for sewing zigzag stitches so there might be something I missed. Yes you heard me, rebuild. I had to change presser foot, feed dog, needle plate, change needle thread tension, rethread the bobbin thread for zigzag, fiddle with a couple of more levers and configure the size of the zigzag. Having an industrial sewing machine makes me feel like a seamstress and a mechanic, all in one :)

For my next pair I will definitely increase the elastics a bit and hope that it’ll turn out better than this.

Skipped stitches in the zigzag seam

Skipped stitches in the zigzag seam

Oddly enough I still can’t bring myself to post pictures of myself wearing just knickers. However, I came up with the great idea of showing you a cartoon version of myself. I am proud to present my colourful twin sister!yuki_clothing_knickers_cartoon


2 Comments

Knickers – a work in progress

Buying knickers and socks is something I find incredibly boring. I never have the patience to try the knickers on before buying them and because of this, I often end up buying something that doesn’t fit me. Basically, I just buy them and hope that I don’t throw my money away. Sadly, for my wallet, I fail 50% of the time.

For me, it’s rare to find an amazing pair of knickers and last time it happened was in Japan. I was starting to run out of clean knickers and I couldn’t be bothered to have the hotel do my laundry. The obvious solution was to buy some new ones and I found some simple and cute ones at Muji in Shinjuku. When I asked a sales woman for help with the sizes she had to apologise for not having any larger sizes. Sure, I’m a bit pear-shaped but in Sweden, I’m pretty small. In Japan I’m more medium to large! Anyway, I ended up buying the largest size and it was a perfect fit!

Ever since we got back from Japan, I’ve been thinking about making myself a copy of those perfect knickers and yesterday I started drafting the pattern. Today I cut out the pieces and sewed the thing together. Even without the elastic, the fit is rather good. I’m not really prepared to post pictures of myself in my underwear so you just need to take my word for it ;) However, here’s a picture of them without me.Next step is to add the elastic. I’m leaning towards using the solid, glimmering white one for the top and the white “lace” for the legs. What do you think? Which one(s) would you choose?


6 Comments

Finished bedspread

It’s been over a month ago since I first told you about the bedspread made of recycled denim. I’m now happy to tell you that it’s finally finished! For about two to three weeks I’ve been thinking “this will finally be the day when I finish it” but no, no, it always takes longer than I expected. However, yesterday was the day :D

When I got to making the back side of the bedspread I went to the store to buy some denim. That part went well. I usually pre-wash all fabrics but I just didn’t feel like pre-washing and ironing 8m of heavy denim. Feeling lazy, I just cut the fabric pieces that I needed and start ironing them. After a while I looked at my hands and realized that karma just punched me right in face. Saying I looked like a Smurf might be a slight exaggeration but let’s just say that I really needed to wash the fabric.

Washing means shrinkage and that was something I hadn’t taken into account when I cut the fabric. Sure, I did cut some extra but nowhere near the 5% needed. Fortunately there were just enough fabric left after washing it twice in cold water and stretching it afterwards. *phew*

At first I had planned on adding a 10cm border around the entire bedspread in the same denim as the one I used for the back. However, I decided to add a smaller border (~1cm) instead. It looked just as good and quite frankly, easier to sew. So I got to use my bias binding maker for the first time and it worked like a charm – even on the thick denim!

Now that I’ve finished this project it’s about time I started working on my pattern grading skills and grade the pattern for the Tamoto dress.