Yuki Clothing

plain and simple


2 Comments

Fabric scraps and gift wrapping

First of all, I’d like to wish all of my readers a Merry Christmas and Happy holidays!

One thing I’ve always liked about Christmas is wrapping gifts. Every year since I was a kid, I used to spend hours wrapping up the gifts. I enjoy that almost as much as receiving gifts myself ;)

For those of you who are doing some last-minute shopping or haven’t wrapped up your gifts already, I’ve got a quick and easy tip. Use some old fabric scraps to wrap them! If the cloth piece is large enough, use it as wrapping paper or just use it as ribbon.I really like how the string on the front gift resembles and obijime and the green fabric scrap an obi sash on top of the Christmasy “kimono” (a.k.a. regular wrapping paper).


6 Comments

Minoru muslin

Even though it’s pretty boring to do the same work twice, I’ve learnt the importance of making a muslin first to make sure that the fitting is good. For the muslin, I found a nice (and very cheap) cotton fabric at IKEA. I wouldn’t have minded a heavier fabric but on the other hand, this one was easy to work with.

Overall, I’m quite pleased with the fitting and I’ve only found two issues with the pattern that need correcting.

  1. Sleeve length – they’re just too long
  2. Hood size – too small for my taste

I’ve decided to shorten the sleeves 2cm and make the hood ~5cm longer. I’m too lazy to attach the cuffs to the sleeves so the 2cm is just a rough estimation. Hopefully it works out.

Minoru Jacket - front

Minoru Jacket – front

I made a few alterations to the pattern before making the muslin. To begin with, I wanted a more “clean” front so I removed the outside front plackets. I needed to keep the inner plackets as they were because of the construction around the inner pockets and the fact that it wouldn’t look nice to have the lining go all the way out to the zipper. I adjusted the outside of the collar accordingly and kept the inside as it was.

For some reason unknown to me, there are no pockets to stuff your hands in when it’s cold. Pure madness, I tell you. To fix this problem, I’ve made a pattern for single welt pockets that will be added to the front (you see my sketch on the muslin).

Minoru Jacket - back

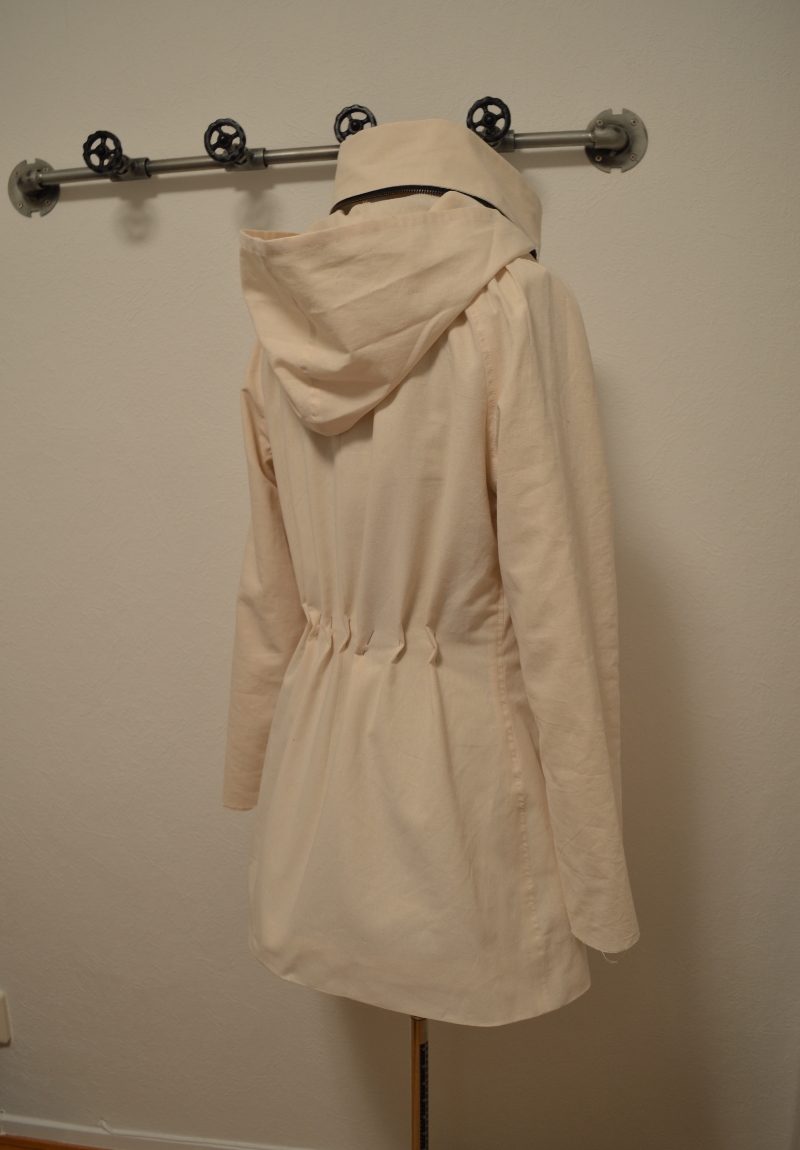
Minoru Jacket – back (I was also too lazy to sew the elastic waistband but I think needles work just fine)

Since the metal zipper can feel very cold against the skin, I will have to add some protection. An extra piece of fabric on the inside should suffice.

I’m going to make another adjustment to the hood. To me, not lining the hood makes no sense at all since I need it for protection against the awful weather.

Minoru Jacket - Collar and Hood

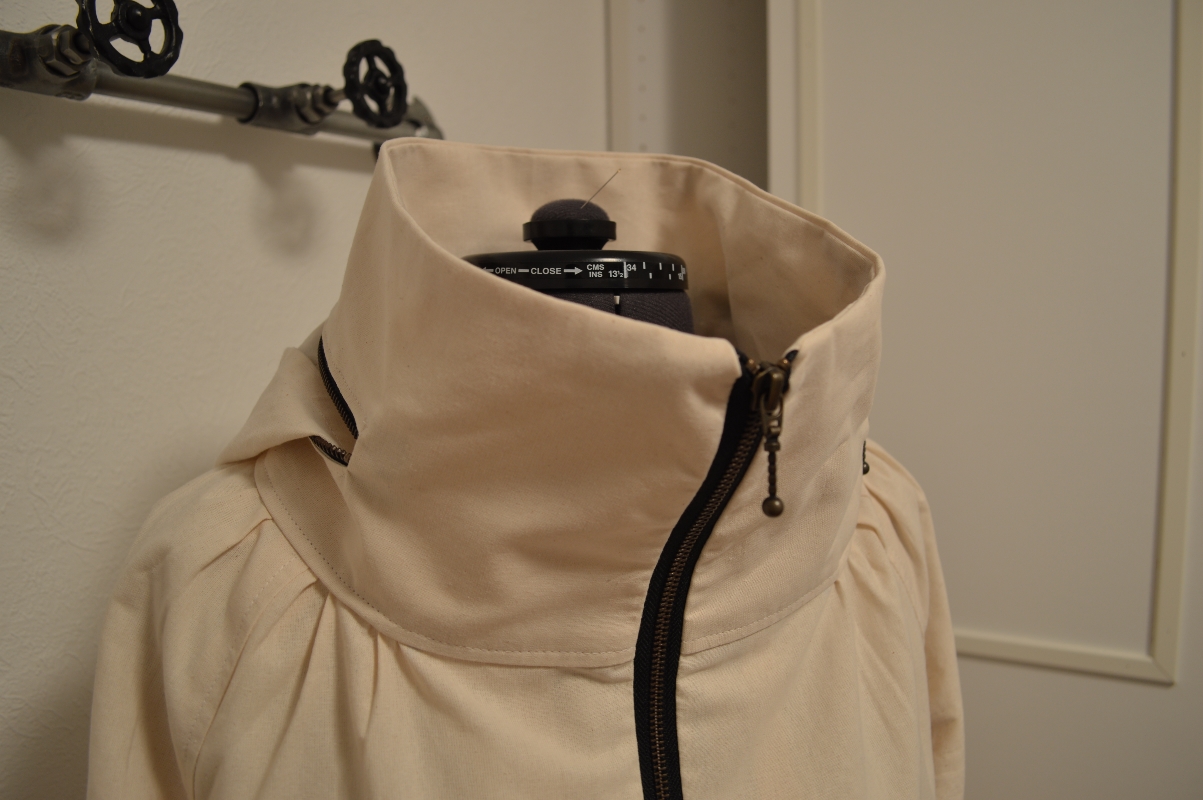
Minoru Jacket – Collar and Hood
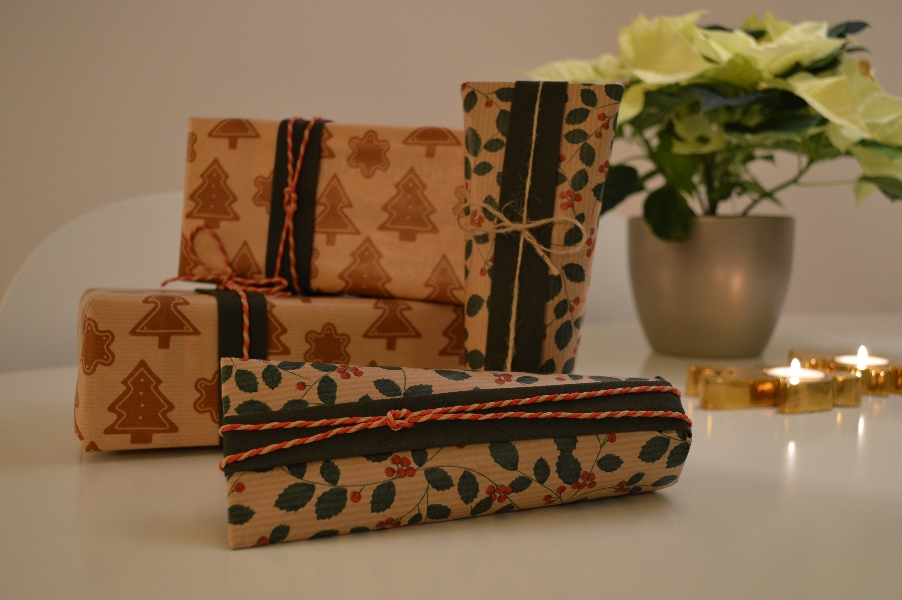

4 Comments

Wedding dress

wedding_dress

Time for a summary of how my wedding dress turned out! It’s made from two different silk fabrics, a thin silk chiffon and a slightly shinier and thicker silk. The colour is off white. The thicker silk was used for the waist band and underlining the dress (corset and first layer of the skirt). The thin silk chiffon was used to drape the upper bodice and the two top layers of the skirt.

If your interested in following the progress of the dress, here are all the work-in-progress posts:


4 Comments

Minoru Jacket

It’s time to start my next project, an autumn/winter jacket! Because I’ve never made a jacket before (not counting the wedding dress jacket), I thought it best to buy a pattern and I choose to go with the Minoru pattern from Sewaholic. This baby has been waiting for me ever since the delivery from fabric godmother earlier this summer and I’m super excited about finally getting started.

Fabrics:
  • Green cotton twill
  • Red cotton tartan
  • Black quilt polyester wadding


10 Comments

Sewing machine maintenance (Singer 20U-53)

Alright, the wedding dress was all finished and it was time to finally start using the new sewing machine, the Singer 20U-53. I grabbed a piece of random cotton fabric and started test sewing. Oh the horror when I realized that the seam looked like crap! I cursed myself for not testing the machine better before I bought it. That time I noticed that the thread tension needed a bit of work but I honestly thought that it just needed some minor fiddling. As it turned out, no minor fiddling could fix this mess. For a week I was sure that I’d bought a (darn expensive) lemon. The worst thing wasn’t the purchase price but the fact that it’s hard to find, and very expensive to hire, a repairman for an industrial sewing machine. This was something I was aware of when I bought the “lemon” but being my usual positive self, I said to myself “what could possibly go wrong!?”. Famous last words, I know :)

The black thread is the bobbin thread and the white is the needle thread.

The black thread is the bobbin thread and the white is the needle thread.

As the first shock settled, I began diagnose the sewing machine. At a first glance, I thought that it was skipping stitches. However, a closer inspection revealed that the needle thread didn’t pull up properly from the bobbin thread side of the fabric. After browsing the Internet for some miracle cure, I put together a troubleshooting list of things that might be wrong and how to fix it.

  • Check the needle thread tension
  • Check the bobbin thread tension. It shouldn’t be too loose or too hard. When holding the thread and dropping the bobbin + case, it should slide down ~5cm.
  • Change needle. It’s best to use a needle that is appropriate for the fabric and the thread you’re using. Make sure it’s properly inserted.
  • Re-thread the machine (both needle and bobbin thread). Consult the machine manual for this.

Those are the first easy fixes. If that doesn’t do the trick, it’s time to grab your toolbox and open up the machine.

  • The needle thread tension. Pick it to pieces and clean everything. Small thread pieces and lint could be your mortal enemy.
  • The bobbin thread case. This needs to be cleaned as well.
  • Clean all the cogwheels. Remove old grease and oil. Remember to perform the cleaning with the right tools that doesn’t leave any lint behind. I found a can of 5-56 and toothpicks very useful.
  • Oil the machine using sewing machine oil. For the love of all that’s holy, do not use canola oil (it’s not good for the machine and rancid oil smells like shit). Judging by the smell when I loosened a couple of the screws, I wouldn’t be surprised if the former owner used the wrong oil for said screws… Depending on the sewing machine you’ve got, you might need to grease some of the gears. I have yet to do this but it looks like sewing machine oil works fine, at least for a while.
  • It could also be that the timing is messed up. Make sure that the needle doesn’t bump into anything on its way down. I considered changing plate and dog feeds just to make sure that this wasn’t the issue.

I don’t think the grease should have this yellow colour and be that sticky. Some 5-56 dissolved the grease enough for me to remove it with a toothpick. As a temporary solution, I applied sewing machine oil. Also notice the large piece of felt. That felt is supposed to be drenched in oil and the same goes for every piece of felt inside the machine. In my case, I think the biggest issues were the oiling and the threading. At first, I threaded the machine according to a manual for a “Singer 20U”. The problem was that it wasn’t made for the 53 model so the information was only partially accurate. I learned that even the slightest deviation from the intended threading managed to screw everything up.

New oil made a huge difference. You could easily tell the difference just by listening to the machine working. Prior to oiling it had a “clonky wonky” sound and afterwards, the sound was much lower and smoother. When I asked the prior owner about how often I should oil the machine she said “once a year maybe”. No wonder the machine was dryer than the Sahara desert under the hood!